Join the ScotiabankStartRight® Program designed for Newcomers‡ and get up to $2,300* in value in the first year.
For newcomers arriving in Edmonton getting to know the public transit system may seem overwhelming. But once you become familiar with the transit system, you’ll be able to get around the city quickly and cost-effectively. When arriving in any new city in Canada, it’s important to have a quick, reliable and cost-efficient way to get around. If you are moving to Edmonton, public transport is one of the best ways to get from one place to another. Edmonton has an extensive transport system that can quickly get you from one place to another within the city. And, it is much more affordable than owning and maintaining a new car.
Edmonton Transit Service (ETS) operates both buses and a Light Rail Transit (LRT) system. Edmonton’s LRT is not the most extensive, but it can cover long distances in a short period of time. Buses are more extensive but they aren’t as fast as LRT trains. The LRT train service combined with the bus system provides a quick and extensive system to meet all your transportation needs.
Public Transit versus Car Ownership
There are many benefits to using the ETS over owning a car. Not only is public transport cheaper than owning a car but it is also more environmentally friendly. Since a single public transport vehicle can carry more people than a car, using public transport will help you lower your carbon footprint. This means that you, as an individual, will be limiting the amount of harmful gases that are released into the environment.
As well, using public transport will also save you on car-related costs such as fuel and maintenance. For newcomers, this is helpful because managing your expenses is critical during your first few months in Canada while you search for a job.
Let’s take a look at both the bus system and the LRT system in Edmonton and how each mode of public transit will help you get around quickly and cost-effectively.
Edmonton Public Transit: Light Rail Transit System
Edmonton was the first Canadian city to build an LRT system with a population of less than 1 million. The LRT is also one of the fastest ways to get around Edmonton. With 18 stations spread out over two train lines, the LRT system provides the backbone for Edmonton’s transit system.
The first of the two LRT lines is the Capital Line. The Capital line connects northeast Edmonton to the south. It consists of 15 stations and 21 km of track, making it bigger than the other LRT line. The second LRT line is called the Metro Line, consisting of 14 stations. The Metro Line and the Capital line both share stations and tracks so the numbers don’t perfectly add up.
Expanding the LRT System in Edmonton
Edmonton has big plans for its LRT system. It plans to expand its LRT system to all sectors of the city by 2040. To achieve this goal, there are currently many projects in the planning and construction stage. To learn about the four major projects concerning Edmonton’s LRT, click here. Here is a brief explanation of each one below.
The first two projects Edmonton is working on both concern the new Valley Line. Once it is finished, the Valley line will connect Millwoods, in southeast Edmonton, to Lewis Farms, in west Edmonton. The Valley Line is divided into two sections, with downtown Edmonton being the divider. The Valley Line will add 27 km of track and 28 new stations to Edmonton’s public transport system once it is finished. The first section of the Valley Line, which connects Millwoods to downtown, is almost finished.
The second section, which will connect downtown to Lewis Farms, is expected to open by 2026 or 2027.
The other two projects are both expansions of the existing two lines. Edmonton is currently working on expanding both the Capital Line and the Metro Line to better serve the transportation needs of Edmontonians. The Capital Line will extend towards the south and the Metro Line will expand northwest.
Once these projects are complete, Edmonton is going to have a modern and extensive LRT system that connects all parts of the city. But even then, Edmonton’s buses will not lose popularity. Let’s take a look at Edmonton’s bus system and when you should use it over the LRT system.
Edmonton Transit System: Getting Around by Bus
Buses are the main mode of public transit in Edmonton. No matter where you live in Edmonton, there will be a bus stop nearby. Most likely, you will have multiple bus stops within a five-minute walk. If you are unsure, you can always open Google Maps and search, “bus stop”, for a map of all the bus stops near you.
Edmonton’s public transport has one of the best bus networks in Canada. With 191 routes and 7456 bus stops, you can get anywhere in Edmonton by using the bus. Keep in mind that you might have to transfer to another bus if your destination is on the other side of the city. However, there is no need to worry as you won’t have to pay extra for a transfer and buses run often.
The bus network, combined with the LRT system makes Edmonton’s public transport an ideal way to get around the city. Public transport is also a very cost-effective option. Let’s take a look at the ETS fare system.
Renting your first home in Canada | Options & solutions for newcomers
Searching for your first home in Canada? Join this exclusive session for key insights on housing market conditions, affordable options, and renting without credit history. Tailored for newcomers settling in the next six months, register now for valuable tips and a free guide!
The fare system for Edmonton’s public transport is simple and easy to understand. To access Edmonton’s full guide on its fare system click here. Below is an overview of fare pricing for public transit in Edmonton. Keep in mind that fare prices are the same for both buses and LRT.
SINGLE FARE
BOOK OF 10 TICKETS
MONTHLY PASS
Youth* (12 – 24)
$3.50
$19.75
$73.00
Adult (25 – 64)
$3.50
$27.75
$100.00
Senior (65+)
$3.50
$19.75
$35.00**
Edmonton Public Transit Fares
*Children under 12 ride free when they travel with a youth, adult or senior. If not, then children must also pay the regular fare of $3.50.
**Some seniors may also qualify for discounted or even free annual passes. To learn more about Senior ETS passes, click here.
As you can see, the regular fare for youth, adults and seniors is the same. However, if you buy a book of 10 tickets, you will get a discount for each ride. You may be wondering, where do I get a ticket book?
Where to Buy Ticket Books
Ticket books are available at many locations. You can buy them at:
Ticket Vending Machines are located at all LRT stations. ETS sales outlets are any retailers that sell ETS fare products. 7-Eleven and Safeway are examples of ETS sales outlets. The ETS online store is another great place to buy ETS fare products. ETS fare products not only include ticket books but also monthly passes for youth, seniors, and adults.
TIP: You can also get a monthly pass for Edmonton’s public transit system. A monthly pass is a great option to help you save money if you plan to use public transit regularly.
Using the Arc Card on Edmonton’s Public Transit System
ETS is currently working on a new way to pay for public transit fares. The Arc Card is an automated fare smart card that can be used to pay for your fare. As of August 2021, the Arc Card is in its first phase of rollout. Once the third phase is complete sometime in 2022, everyone will be able to use the Arc Card to pay their fare.
The Arc system is based completely online, meaning if you lose your registered Arc Card, you can transfer your account balance to a new card.- Once the Arc Card has been fully released in Edmonton, you will be able to get one at any Arc Card vending machine in the city. Arc Card vending machines will be available at every LRT station throughout the city. As the Arc Card is getting released, ETS will also start making Arc Cards available at other locations as well.
Financial Benefits of Using the Arc Card
Using an Arc Card will allow riders to contribute to a monthly or daily cap. The monthly cap for an adult rider using the Arc Card is $100. This means that once you have $100 worth of fares using the Arc Card, you can ride the ETS for free for the remainder of the month. It is sort of like a monthly pass, except you only pay when you ride. This system is designed to reward frequent ETS riders and encourage them to use the Arc Card. Click here for Edmonton Transit fares and passes.
Keep in mind that Arc is a new project and many things are subject to change. ETS has not released an Arc Card for seniors or youth yet so all the numbers have not been set. By the time Arc is released in 2022, all ETS riders will be able to get an Arc Card. As of now, it is clear that Edmonton is introducing this new electronic fare system to make fare payment easier and help frequent riders save money on transportation.
Using Edmonton’s public transit system is a great way to get around the city. From expanding LRT routes to introducing the Arc Card, Edmonton is currently working on many ways to improve its transit system. In the future, you can expect to see an even more modern and well-connected public transport system throughout the city. This can provide the convenience and cost savings that can help you when you arrive in Edmonton.
Calgary is an eco-friendly city and its public transport system is no exception. One of the greenest and most convenient ways of getting around the city is Calgary’s public transport system. For newcomers, it’s helpful to get familiar with the public transport system so you can use it to get around and reduce your expenses. This guide provides an overview of how public transport works in Calgary and how you can use it.
Public Transport in Calgary
Calgary has a simple, yet thorough public transport system that is owned and operated by the city of Calgary and managed by Calgary Transit. Its public transport is made up of mostly buses and a Light Rail Transit (LRT) system called the CTrain. Together, this simple and convenient transport system will serve all of your transportation needs in Calgary. Calgary’s public transport system is managed by
Public Transport in Calgary: CTrain
Calgary’s CTrain is one of the fastest ways to get around the city, reaching speeds of up to 80 km/h. The CTrain is an LRT, a modern type of rail transit that runs on electricity. There are two CTrain lines in Calgary, called the Red Line and the Blue Line. Because of its speed and reliability, the CTrain is usually the better option over buses.
The Red Line is the first and largest CTrain line in Calgary. It runs from the northwest quadrant of Calgary, through downtown and ends at the south side of Calgary. The Blue Line is the second of the two lines. It runs from the northeastern quadrant of the city, through downtown, and ends at the western side of Calgary.
Together, these two lines provide the backbone for Calgary’s public transport system. The CTrain is a fast and reliable way to get around the city, with trains running every 15-30 minutes. The CTrain operates from around 4:30 AM to 1:00 AM. Generally, trains run longer on the south side of Calgary, as the south side is usually busier. Click here to access the full map of CTrain routes and stations, as well as maps for every individual CTrain station.
Constructing a New Transit Line
There is currently a third CTrain line under construction, called the Green Line. Once it is finished, the Green Line will run from the north side of Calgary to the southeastern quadrant. The Green Line will have 29 stations that are spread out over 46 kilometres of track, making it the biggest of the three lines. The first stage of construction, which consists of only the first 15 stations is expected to be completed in 2027. To learn more about the Green Line LRT project, click here.
One of the downsides of the CTrain system in Calgary is that it is not very extensive. Even with the completion of the Green Line, the CTrain will still not serve all your transportation needs by itself. So to get to places where the CTrain doesn’t go, you will need to use the bus.
Public Transport in Calgary: Buses
Calgary’s bus system runs on a Bus Rapid Transit (BRT) system. Buses are a more extensive mode of public transport compared to the CTrain. And wherever the CTrain doesn’t go, buses will. With over 169 bus routes and 6000 bus stops, you can go almost anywhere in Calgary by using the bus. The bus schedule depends on the specific bus route. Generally, buses run every 20 minutes.
Buses are an ideal form of transportation if you need to travel to a place where the CTrain doesn’t go in Calgary. If you are travelling from one side of Calgary to another, a combination of both bus and CTrain routes is usually the fastest way to get to your destination.
Calgary Transit has a helpful tool that will tell you all the timings for each bus route. This tool will also give you directions on what bus to take if you put in your starting location and destination. If you are planning to use Calgary’s bus system in the future, make sure to check it out by clicking here.
Calgary has a simple and easy-to-understand fare system for its public transport. The fare prices make public transport a much cheaper alternative to owning a car. Let’s take a look at the fare system for Calgary’s public transport below:
Adult Fare (18+) – $3.50
Youth Fare (6-17) – $2.40
Children aged five or under can ride free on Calgary Transit.
These are the basic fare prices you must pay every time you ride on the CTrain and the bus. Once you have paid for your fare, your ticket will be valid for 90 minutes. This allows you to transfer buses and trains for free, as long as the transfer happens within 90 minutes of purchasing your ticket.
Make sure you have a full plan of what buses and trains you need to take to your destination. If you transfer from the CTrain to a bus or vice-versa, you will need to ask for a transfer from your bus driver or hold on to your CTrain ticket.
How To Pay Your Fare
The most common way to pay for your fare is by cash. Another convenient way to pay your fare is by using the My Fare app. My Fare is a mobile app that you can use to buy tickets for your upcoming ride. The process is fast and reliable and it saves you from carrying change to pay your fare. You can also buy monthly or day passes from the My Fare app. Here is a guide by Calgary Transit to help you get set up with the My Fare app.
You can also buy tickets and passes from Calgary Transit’s online store. The online store also sells ticket books. You can buy a book of 25 tickets or 10 tickets for both adults and youth. Click here to access Calgary Transit’s online store.
Calgary Transit also has day and monthly passes. A monthly pass is valid until the end of the calendar month and a day pass is valid until the end of service that day. Here are the prices for monthly and daily passes for Calgary’s public transport:
Adult (18+) Day Pass – $11
Youth (6-17) Day Pass – $8
Adult (18+) Monthly Pass – $109
Youth (6-17) Monthly Pass – $79
If you plan to use Calgary’s public transport daily, it’s a good idea to get a monthly pass. Paying for a ticket each time you ride can start to add up if you ride often and monthly passes are a good way to reduce costs. Daily passes are good for visitors or anyone who is planning on using Calgary’s public transport more than three times that day.
Getting Around Calgary by Bike
Calgary has some of the best urban parks and pathways in Canada. Along with good bike infrastructure, this makes Calgary a bike-friendly city. If you prefer to bike rather than use public transport, Calgary is a great place for cyclists.
Calgary has an amazing public transport system that thousands of Calgarians take advantage of each day. Not only is using Calgary’s public transport cost-effective, but it also helps the environment. The LRT combined with Calgary’s thorough bus system is a quick and reliable way to get around the city. Together, these two modes of transportation will help you find your way around Calgary while making Calgary a truly green city.
Pay deductions can often be confusing and can come as an unpleasant surprise if you weren’t expecting them. Canadian workers have quite a few pay deductions that you should be aware of. Some of these are mandatory, like taxes, while others are voluntary, like union dues. These deductions make the difference between net pay and gross pay. Many pay deductions are there to help you in the future. However, you won’t be able to take advantage of the extra money if you do not know where it is and how you can access it.
Getting Your First Job in Canada
After you accept a job in Canada, you will receive a job offer letter. This is an exciting time! Your offer letter, also known as an employment letter, will include:
Annual pay
Method of payment and how often you will be paid
Work schedule
Job description and duties
Workplace rules and policies
Other employment conditions such as benefits and commissions.
The amount of money that is shown in the letter will not be the same amount that you will receive. This is because the amount on the letter is your gross pay.
Understanding Net Pay and Gross Pay
Understanding the difference between net and gross pay is important to put your money to the best use. Fortunately, net pay and gross pay are quite easy to understand.
Gross pay: the money your employer pays you before mandatory and voluntary deductions.
Net pay: the amount of money you receive after deductions.
Each time your employer pays you, they must deduct a certain amount from your paycheque. The deductions depend on:
The province you live in (each province has its own income tax rate)
What type of job
How much you are paid
What programs you are part of (pension plans, Unions, etc.)
However, when an employer tells you how much you are going to be paid they are talking about gross pay. Gross pay is your pay before deductions. It is not actually what you are going to receive. Your gross pay includes bonuses, commissions, and overtime pay.
Arrive in Canada Financially Prepared
Ready to take control of your financial journey in Canada? Join our expert-led online webinar! Learn essential banking tips to build a strong financial foundation. Hear from David Frattini, Managing Partner at Prepare for Canada, and Neil Dhanani, Financial Advisor at Scotiabank, as they guide you through everything you need to know.
From your gross pay, your employer will deduct the following:
Taxes
Canada Pension Plan (CPP) and
Employment Insurance (EI).
These deductions are not lost, however. Taxes pay for many public and social services in Canada. CPP and EI will also benefit you in the future when you retire or if you lose your job.
After all the deductions, the remaining money is your net pay. This is the amount you will take home. Avoid confusing your gross and net pay because you need to budget your net pay, not your gross pay.
Your pay stub, or the letter you will receive with every pay, will have your gross and net pay. Your gross pay is listed at the top of the pay stub, followed by any deductions. At the bottom, you will find your net pay. This is the amount of money you will receive for that payment term.
Now let’s look at different pay deductions and how they affect your pay.
Voluntary Pay Deductions, Net Pay, and Gross Pay
Your employer must deduct any voluntary pay deductions before they deduct any income tax. These deductions will affect your net pay. Some examples of voluntary deductions include:
Union dues
Uniforms, Meals, Equipment (anything you buy from your workplace)
Automated deposits that you set up with your bank.
Not every paycheque will have these deductions because you will choose whether or not you want them. Whenever you buy anything from your workplace, you will either have to pay on the spot or the amount will be deducted from your pay. If you are part of a trade union, your union dues will also be deducted from your paycheque.
Any automated deposits you arrange will also be deducted from your paycheque. These deposits may be linked to your savings account or automatic contributions to a Registered Retirement Savings Plan (RRSP).
Depending on your job, you could also have other deductions as well. Review your pay stub each month to ensure the deductions are correct. If you see a deduction you don’t recognize, talk to your employer about it. Keep in mind this money is not taxable income. You pay taxes based on the income after deductions.
Mandatory Pay Deductions from Your Gross Pay
Income Tax
Once all the voluntary pay deductions have been made the remaining money is taxable income. The government will take some of your taxable income as income tax. Income tax goes to both the provincial government and the federal government. The government uses this money to invest in education, healthcare, and infrastructure.
Employment Insurance(EI)
Another deduction that is made from your taxable income is EI. As the name suggests, employment insurance provides financial support in case you lose your job. EI provides a temporary income to workers while they are forced to leave their jobs due to illness, need to care for family, or upgrading skills. Click here to learn more about Employment Insurance.
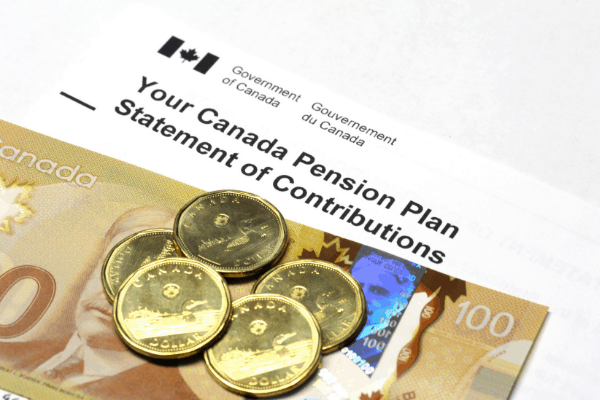
Canada Pension Plan (CPP)
Another mandatory pay deduction is CPP. This deduction ensures that you have some financial support after you retire. CPP functions to replace some of your current income when you retire. Of course, the more CPP you contribute, the higher your pension will be when you retire.
Another way to increase your pension after retirement is to work longer. The earlier you retire, the less pension you will receive each month. So to receive more, you can retire later. The standard age of retirement is 65. However, you can retire as soon as 60 and as late as 70.
Net pay and gross pay: CPP is deducted from your gross pay
Payroll Deductions Can Provide Financial Security
As you can see, many payroll deductions help you save for the future. However, you can take things further by adding more deductions to your pay, each payment term. I know it’s tempting to want all your money from each paycheque but it’s wise to save for the future.
A good way to save for the future is to set up automated deposits into your savings account or a Registered Retirement Savings Plan (RRSP). These automatic deposits contribute a portion of your paycheck into whatever account you want them to.
Saving for Your Future in Canada
You can refer to the 50/30/20 budgeting rule if you’re unsure how to budget your money. The rule recommends you put at least 20% of your pay toward savings. This way, you will have most of your pay for fixed expenses and entertainment while building savings over time.
If you plan to pay for your child’s post-secondary education, you can also open a Registered Education Savings Plan (RESP). An RESP is a great way to save for post-secondary education because the government will also contribute money to your RESP for every dollar you contribute. You can set up another automated deposit for this.
The best financial advice is to stick to a budget and automated pay deductions are no exception. Divide your money properly and have enough to pay for basic expenses before you set up any automated deposits. However, it may be wiser to make manual deposits if your income is not reliable or low.
Online learning, also known as e-learning, is a practical and convenient way for people from around the world to develop and enhance their professional skills. Taking online learning courses is also a great way to learn new skills and get certified from the comfort of your home. People from all over the world are upgrading their skills and learning new ones for the workplace. It is now easier than ever to learn something new, whether you want a live instructor, or want to work at your own pace.
Completing an online certification course and adding it to your resume can greatly increase your chances of getting hired. Canadian employers highly value job candidates that have an online certification (a certified online course). A certification indicates that you have the skills required to work in Canada and to succeed at the job. And, if you plan to work in a regulated occupation in Canada, getting the required training will be essential.
Online learning has been seeing a lot of growth over the past decade. Now, due to the COVID-19 pandemic, online learning has become the new normal. And, it’s safe to say that online learning isn’t going away anytime soon. Even after the pandemic online learning is expected to keep growing.
Within the category of online learning, there are different types of online learning methods. The most common methods include:
synchronous learning,
synchronous learning
hybrid online learning.
Any other online learning methods usually fall under these three categories or somewhere in between.
What are Online Certification Courses?
Online certification courses give you a certificate upon completion. This certificate indicates that you have finished the course and have all the skills taught in that course. These are the types of courses that you can include in your resumeand show employers.
Certification courses generally cost more than regular courses and have assessments as you progress through the course. In the end, however, certification courses are worth your money because they can mean the difference between getting hired and not getting the job. And, even if you have not yet completed the course, you can always indicate that you are in the process of completing the training and provide the date that you expect to complete it.
Synchronous online learning is online learning that happens in real-time with a live instructor. This method allows the instructor and the learners to gather at a virtual place at the same time. This online gathering is usually conducted through online video call apps such as:
Zoom
Skype
Microsoft Teams
Google Meet.
Video tools to facilitate online learning
The reason most people prefer synchronous online learning methods is that it is an interactive learning experience. You will participate in active discussions, interact with instructors and other students, and get immediate feedback. It is the closest you can get to a traditional classroom when you are learning online.
Some people might even prefer synchronous online learning over traditional classroom learning. This is because synchronous learning is flexible. Even though it takes place in a live setting, synchronous learning offers flexibility. This does not mean that there will be no due dates, but you will get to decide how to divide your work and get things done on time.
Many organizations offer online synchronous courses, including many professional associations. And if your work-from-home job requires training, online synchronous lessons will probably be the learning method used. If you want to sign up for a certain type of synchronous course, your best bet is to browse the internet and check out different courses offered by universities. You can also check with professional or trade associations that represent your occupation.
Asynchronous Online Learning
Asynchronous online learning is the opposite of synchronous online learning. This type of online learning is based on learning at your own schedule. This means that you will not get to talk to your instructor or interact with peers. You will most probably follow along with a video series and do the task accordingly. This is the most common type of asynchronous learning and it goes by the name Massive Open Online Course (MOOC).
Understanding MOOCs
The objective of MOOCs is to attract people in the thousands and get them to sign up. Because of this, you can usually get MOOCs for very reasonable prices. You can even find MOOCs are free. However, if you want to get a certification you will have to pay a fee. The cost for courses can vary depending on the certificate that you receive.
MOOCs have both advantages and disadvantages. A MOOC offers a very flexible style of learning, maybe a bit too flexible. MOOCs have a completion rate of under 10%. This means that only 10% of the people that enroll for a MOOC actually complete it. This is directly related to the fact that MOOCs are designed for people that want to learn at their own pace. Now, let’s take a look at some of the most common MOOCs and how they work.
1. Linear Autoplay MOOCs
Linear autoplay courses are the most basic online courses and they are also the most common MOOCs. However, linear autoplay courses are not very engaging. All have to do is watch a couple of videos to finish them. This type of MOOC consists of a series of video modules that, when put together, teach you a new skill or subject. Because there are no assessments, these MOOCs usually don’t offer a certificate.
2. Linear Autoplay MOOCs + Assessment
This type of MOOC is the same as linear autoplay MOOCs except that it also offers assessments. Typically, after watching a few video modules, you will have to pass an assessment before you can move on. This ensures that you are learning what the instructor is teaching. Some of these MOOCs may offer a certificate because of the learning assessments. In general, these courses offer a good mix of flexibility to keep learners on track.
3. Random Access MOOCs
This type of MOOC is one of the most flexible and open-ended courses you can take. It has no linear order to watch the videos, no assessments, and no certification at the end. Rather, students get to choose in which order they watch the videos. This can be both positive and negative. Random access MOOCs are made for students that only want to learn a specific part of a course. Rather than taking the whole course to learn only a part of it, random access MOOCs allow you to watch any part of the course, in whichever order.
MOOCs are a great option if you feel like you are committed to learning something online. MOOCs are a cheaper and more flexible alternative to synchronous online learning. Some even offer certifications!
Some of the best places to sign up for MOOCs are Coursera, and EdX. Coursera and EdX have partnered with the University of Toronto to provide free MOOCs. They are a great way to get started with online courses.
Another great way to get free MOOCs is through your public library in Canada. If you have a library card from your public library, you will also have free access to Lynda, also known as LinkedIn Learning. To access Lynda, you can log in to your library’s website and find the Digital Content section, or something similar. Each library has its own website so this will vary from library to library. However, almost every public library in Canada offers free access to Lynda.
Many newcomers are interested in free online resources to help them improve their language skills in English and French. If that sounds like you, the government of Canada has some great resources for you. Resources of the Language Portal of Canada can provide great tools to help you improve your language skills in Canada.
Hybrid Online Learning
Hybrid online learning is a common e-learning style. It is a mix of asynchronous and synchronous online learning to give students flexibility and to interact with peers and instructors.
You can think of hybrid learning as asynchronous learning with a few online meetings. You will mostly work on your own time. But there will be deadlines and you will also have the option to talk to your instructors and peers. Most of the instructors teaching these classes will also provide an email or some sort of messaging tool to contact them. This will give you access to feedback, even if you might not get an immediate response.
Keep in mind that hybrid online learning is different from hybrid classes. These terms can easily be mixed if you do not know the meaning of each. Hybrid classes are a mix of synchronous online learning and traditional classroom learning. This style of learning is also used by schools, universities, and any teaching institutions that are otherwise, taught in person. Because students must go to a school, It is not considered online learning.
Online learning has many uses and it can be useful to a wide range of people. Whether you are looking to upgrade your skills for the workplace or want to learn a new skill for yourself, online learning is probably the way to go. Online courses will not only help you with getting the job, but they will also help you excel at it. And the best thing is that learning these skills is now easier than ever.
To learn more about working in Canada, visit our Finding a Job in Canadaresource page for free resources, information, and upcoming webinars.
Newcomers should know about the different types of bank accounts to use all the financial resources available to them. Knowing what each bank account is for will help you to put your money in the right place. Opening a bank account is one of the first things you do upon arrival in Canada. A bank account is a place where you can keep your money safe. And buying a house or using a debit card to pay at a grocery store would not be possible without a bank account. As well, a bank account makes you eligible for a loan such as a mortgage and is a convenient way to store your money.
What is a bank account?
A bank account is an account in which you can deposit and withdraw money. These transactions can be both negative and positive. A positive transaction is when you deposit money in your bank, making your account balance go up. A negative transaction is when you take out money from your bank account, making your account balance go down. These transactions decide what your account balance is, or how much money you have in your bank account.
With your bank account, you can store large amounts of money that you can withdraw at any time. However, not all bank accounts will allow you to withdraw money at any time. There are two main types of bank accounts; a chequing account and a savings account.
Opening a chequing account
Opening a chequing account will probably be the first thing you do in Canada because it is the account you will use for your day-to-day expenses. It allows you to withdraw money at any time, making it a convenient way to pay for expenses such as your grocery bill and withdraw money from an ATM. Opening a chequing account will also get you a debit card. A debit card is a card that can make payments without cash. Almost every store in Canada has a debit card terminal so you will almost always have the option of paying digitally from your chequing account.
One thing to keep in mind is that most chequing accounts have a small monthly service fee as long as the account is running. Most chequing account service fees are usually around the $10 range. However, some chequing accounts have no service fees, called no-fee chequing accounts.
Some chequing accounts also offer ways to avoid paying monthly service fees. Some ways to avoid service fees are to either maintain a set minimum balance or deposit a certain amount of money into the account each month. The minimum deposit is usually around $5000. This means that if you have more than $5000 in your chequing account, you will be charged no fee that month. A minimum deposit usually ranges from $300 to $500. This means you need to deposit at least the minimum deposit amount in order to avoid paying your chequing account fees.
Opening a savings account
Opening a savings account allows you to save and grow your money. Unlike your chequing account, a savings account earns you interest on the money you save. However, a savings account cannot be used for day-to-day expenses. There is a fixed number of transactions you can do from your savings account each month, and that number is usually three. If you do any more transactions than that, you will have to pay transaction fees which make a savings account inconvenient for daily expenses.
Opening both a savings and a chequing account is a great way to manage your money. Together, they have all the features to meet your financial needs. You can keep the money you need for your daily expenses in your chequing account while keeping any additional money in your savings account. That way, you can pay for your expenses while earning interest on the rest of your money.
Now let’s look into some more specialized types of bank accounts that will help you save for the future.
Arrive in Canada Financially Prepared
Join us for an eye-opening session on how to build your financial future in Canada with confidence. This free webinar is hosted in partnership with Scotiabank, a trusted leader in newcomer banking.
Together, we’ll guide you through how the Canadian banking system works and share free tools and strategies to help you plan, save, and invest wisely as a newcomer.
Types of bank accounts to help you save for the future
Canadian banks have many resources to help you achieve your financial goals. Some of those resources include specialized bank accounts. The types of bank accounts covered in this section will help you achieve your financial goals faster. These accounts are all registered, meaning they are registered with the Canada Revenue Agency (CRA) to provide tax shelters. All the specialized accounts listed below are great saving resources because they can help you save on taxes.
The accounts covered in this section are Registered:
Retirement Savings Plan (RRSP)
Education Savings Plan (RESP)
Disability Savings Plan (RDSP)
Learn about Registered Retirement Savings Plans
Opening an RRSP is a great way to save for your retirement. An RRSP works by delaying when you pay taxes on your income. This can be both to your advantage and disadvantage. The reason this is considered a retirement savings plan is because you will be in a lower income tax bracket at the age of retirement.
When you deposit money into your RRSP, it will come off your income directly and won’t be considered taxable income. For example, if your income is $50,000 and you decide to put $5000 toward your RRSP, the government will only make you pay income tax on $45,000 of your income.
This doesn’t mean you don’t have to pay taxes on that money in the future. When you withdraw money from your RRSP, that money will be considered as your income, and you will be taxed on it.
So then what is the point of RRSPs? If it saves you from taxes now, only to make you pay taxes in the future, why open an RRSP account? The answer is simple. You will have to pay more taxes when you are earning compared to when you are retired. When you take out money from your RRSP at retirement, you won’t have to pay as much income tax compared to when you were working.
Learn about Registered Education Savings Plans
As the name suggests, opening an RESP will help you save for your child’s education. Here is how an RESP works.
Every time you deposit money into your RESP, the government of Canada will contribute some money to your RESP as well. This money is called Canada Education Savings Grant, or CESG. A basic CESG is 20% on top of your deposit. However, low-income families might qualify for a 40% CESG.
To put this into perspective let’s look at an example.
Let’s say you deposit $2000 to your RESP this year. With a basic CESG, the government of Canada will contribute an additional 20% of that $2000 to your RESP.
$2000 x 20% = $400.
After your $2000 deposit, your RESP account balance will be $2000 (your contribution) + $400 (government’s contribution), which is $2400.
Learn about Registered Disability Savings Plans
An RDSP is a savings plan intended to help people with disabilities save for a financially secure future. It works very similarly to an RESP. The government contributes money for every dollar you put in your RDSP. Unlike an RESP, however, RDSPs offer incredible returns, even as much as triple your contribution. The money contributed by the government is called the Canada Disability Savings Grant, or a CDSG. CDSGs will vary from person to person so they can even be as high as 300%!
RDSPs are an amazing way to save for the future and ensure a financially secure future for anyone with a disability. They offer some of the best returns on investments in Canada so if you are eligible for an RDSP, look into getting one.
To learn more about registered accounts in Canada, here is an article on RRSPs, RESPs, and TFSAs that explains each of those in detail, as well as some frequently asked questions.
Babies and children need special protection while travelling in a car. Child car safety seats are there to help keep your child safe on the road. They prevent multiple injuries among children during road crashes and sudden stops. This is why they are mandatory in Canada.
Note: The numbers provided in this article could be different depending on your province as each province has its own laws. I will provide the numbers that are found most commonly throughout Canada.
Child Car Safety Seats in Canada
Children that are required to have a child car safety seat, must sit in their safety seat at all times when in a car. The rules for child car safety seats apply to any child in Canada who meets the age, weight, and height criteria.
hen arriving in Canada, you must have a child car safety seat when travelling from the airport. If your child requires a car safety seat, prepare to have one before you arrive in Canada.
4 Types of Child Car Safety Seats
There are four child car safety seat categories. Which one your child should have, depends on their age and height. These four categories, in order from youngest to oldest, are:
Rear-facing car seats
Forward-facing car seats
Booster Seats
Seat belts (for children).
Most of Canada uses these four categories. However because provincial governments make their own laws, Alberta, Nunavut, and the North West Territories do not have booster seat laws. Still, booster seats are recommended.
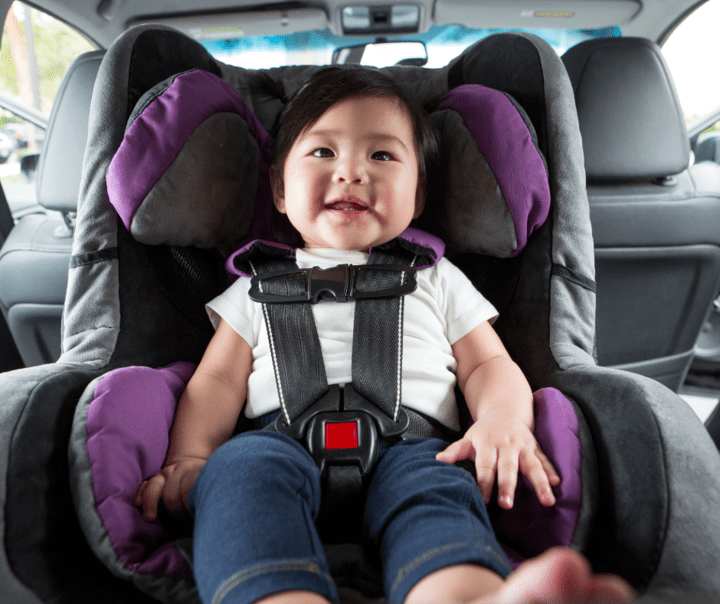
1. Rear-Facing Car Seats
Rear-facing car seats, as you may have guessed, face the back of the car. The children sitting in them will be facing the back of the car instead of facing forward. This type of car seat is for infants and toddlers. They are effective in preventing injuries that could have been caused without one.
There are 3 types of rear-facing car seats you can buy:
A regular rear-facing seat
A convertible car seat (that can later be converted to a front-facing seat)
An all-in-one seat (that can later be converted to both forward-facing and booster seat).
Naturally, the last 2 are more expensive than a regular front-facing seat. However, they are a good investment because you won’t have to buy another car seat in the future when your child outgrows their rear-facing seat.
Requirements for Rear-Facing Car Seats
Rear-facing car seats are mandatory for babies that are under 9 kg (20 lbs) or one year old. As mentioned earlier, these numbers will differ from province to province.
After your toddler has passed their mark, either by age or weight, you can choose if you want to:
keep the rear-facing seat, or
upgrade to a forward-facing seat.
It is recommended that you keep a rear-facing seat for your toddler because a rear-facing seat is a lot safer. Many parents chose to keep rear-facing car seats until their child reaches the age of two.
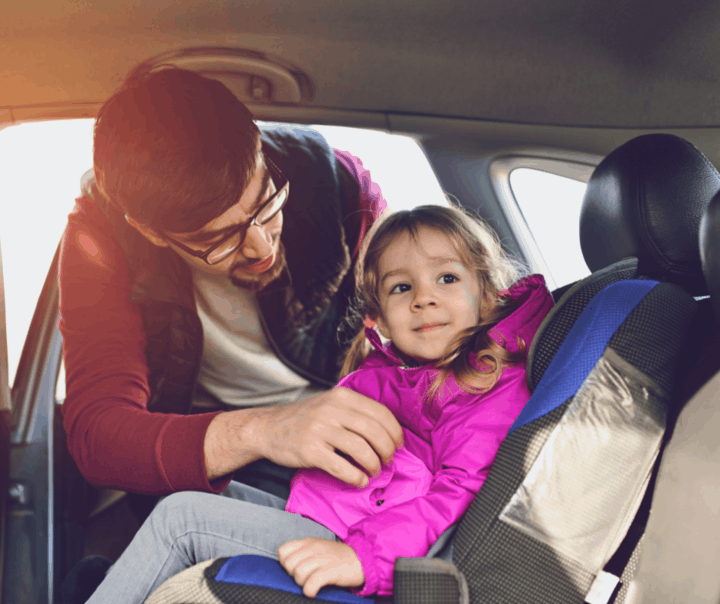
2. Forward-Facing Child Car Seats
Once your child exceeds the weight limit of their rear-facing car seat, or you decide it’s time to upgrade, your child gets a forward-facing car seat. A forward-facing car seat is not as safe as a rear-facing car seat but, unlike a rear-facing seat, it can hold bigger children.
There is more legroom in a forward-facing car seat and it usually has a higher weight limit. You can buy a regular forward-facing car seat, a convertible, or an all-in-one seat.
Requirements for Forward-Facing Car Seats
A child must sit in a forward-facing child seat until they are at least 18 kg (40 lbs). After that, you can choose whether or not you want to get your child a booster seat. Even though forward-facing seats are not safer than rear-facing, they are safer than booster seats. This is why you should keep your child’s forward-facing seat for as long as you can before they exceed the seat’s weight limit.
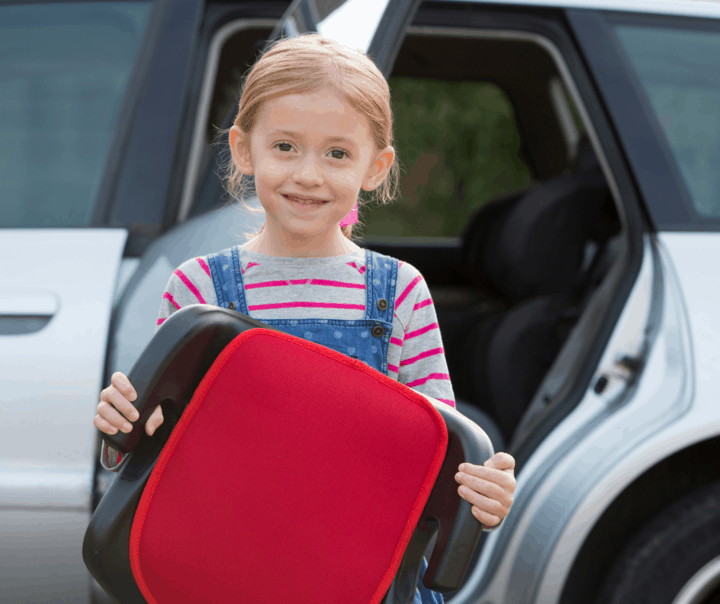
3. Booster Seats
A booster seat is the third and final car seat your child will sit in. Booster seats raise children to a level where a seat belt will fit them. It also provides head and neck protection during a crash. Booster seats are estimated to be about four times safer than a normal seatbelt during a crash.
Booster Seat Requirements
A child is required to be in a booster seat until they:
Reach age eight
Are taller than 4’9”, or
Weigh more than 36 kg
Once they reach one of those benchmarks, they are legally allowed to use a regular seat belt. Of course, you should check the exact numbers for your province as these numbers differ from province to province.
A good way to check if your child is ready for a regular seat belt is to see if their legs drop comfortably over the seat’s edge while their back lines up with the back of the seat. If this is the case, and your child has passed your province’s regulations, your child can use a normal seatbelt.
4. Seat Belts
After a child has outgrown their booster seat, they can use a regular seatbelt. However, there are some restrictions. A child under the age of 14, that uses a regular seat belt, must sit in the back seat of a car. Only people aged 14 and above are allowed to sit in the front passenger seat.
Before a child starts using a regular seat belt, it is the parent’s job to ensure that the seat belt fits them properly. To ensure a seat belt fits your child, make sure that the lower strap goes around the hips and not the stomach. The shoulder strap (the one going diagonally) should nicely rest on the shoulders and not touch the neck. If this is not the case, your child should stay in a booster seat.
If your child has outgrown their booster seat but isn’t ready for a regular seat belt, then it is recommended that they get a bigger booster seat. Most likely, however, booster seats are designed so that your child will be ready for a regular seatbelt right after they have outgrown their booster seat.
Installing Car Seats
Installing car seats properly is just as important as installing car seats in the first place. Properly installed car seats can mean the difference between life and death during a car crash. I will go briefly over how to install each of the three types of car seats in this section.
Keep in mind that there are many instructional videos on how to install car seats online. The Ontario Ministry of Transportation has great resources to help you install your child’s car seat. To access the full guide on how to install a car seat, click here.
Note: Never install a child car safety seat near an active airbag. If there is an airbag where you want to install the seat, have the airbag disabled. Airbags can harm children if they inflate during a crash.
How to Install a Rear-Facing Car Seat
Rear-facing car seats are installed at an angle to allow your child to lie down. Rear-facing car seats will have a sticker at the side indicating the angle at which the seat should be. Most seats have angle adjusters to achieve the correct angle. If yours doesn’t have an angle adjuster, you can use rolled-up towels or some kind of prop to hold the seat at an angle.
Once you have figured out how to get the seat to the correct angle, you can fasten the child’s safety seat to the car. To do this, you will have to use either a seat belt or the Universal Anchorage System (UAS). All new cars in Canada have a UAS. Cars older than 2002 may not have one.
To learn how to install a rear-facing car seat properly, check out this guide from the government of Canada. It covers both UAS and seatbelt installation methods
How to Install a Forward-Facing Car Seat
Installing a forward-facing car seat is pretty similar to installing a rear-facing car seat. To fasten a forward-facing seat to the car, you can use both the UAS and a seatbelt. Unlike the rear-facing seat, however, a forward-facing seat does not rest at an angle; it must be fastened upright.
Another thing to keep in mind is that there should be no twists in any of the straps. If a twist appears in one of the straps, make sure you undo that step to keep the strap straight.
To learn how to install a forward-facing car seat properly, check out thisguide from the government of Canada. It provides step-by-step instructions to use both UAS and seat belt installation methods.
Installing a Booster Seat in Your Car
The installation method for a booster seat is pretty straightforward. The booster seat rests on top of the car’s seat, fastened by an anchor strap to the car’s UAS. Its purpose is to make sure that the car’s seat belt can fit the child by boosting them up to a higher level. A booster seat makes sure that the lower strap of the seat belt goes across the hips of the child and the diagonal strap rests nicely on the shoulder.
There are some things you check in a car seat, especially if you bought it used:
Make sure it hasn’t passed its expiry date, which will be indicated somewhere on the seat.
Check to see if there are any cracks. Any cracks can lead to the car seat getting damaged during an accident. This is dangerous for the child sitting in that car seat.
Make sure that the seat is fastened at the right angle and in the right direction.
Make sure the car seat can hold your child’s weight and height. Wrongly sized car seats will be uncomfortable for your child and less effective in an accident, or sudden stops.
Which Car Seat Should I Buy?
Car seats vary significantly in price and quality. And there is always the option of buying used car seats, which are considerably cheaper. However, it is smart to invest in a durable all-in-one, also known as a 3-in-one, car safety seat. You will only have to buy one car seat in your child’s lifetime, which will serve as a:
rear-facing
front-facing, and
booster car seat.
Here are some of the most durable and reliable car seat brands.
Britax
Britax is one of those car seat brands that are hard to ignore when shopping for car seats. These child car seats are on the more expensive side of the car seat market, but they are very durable. Some will even last more than 10 years!
Now let’s discuss pricing. A Britax all-in-one child car safety will cost anywhere from $450. Seems expensive at first glance, but it will save you money in the long term by eliminating the need to buy new car seats. A regular Britax rear-facing seat will only cost around $200.
Diono
Diono car seats are usually less expensive than Britax car seats. They tend to have fewer features and a smaller lifetime. Still, they are a great pick for someone that has a smaller budget.
A Diono all-in-one will cost around $350 and a regular rear-facing seat will cost around $150. You can find a Diono booster seat for as little as $50!
Graco
One of the more well-known brands is Graco, and for good reason. Graco car seats are a perfect combination of quality and affordability.
A Graco all-in-one car seat will cost you around $300. A Graco rear-facing car seat will cost you $150 while a booster seat will cost you around $100. There is even a Graco backless booster seat for only $35.
Buying a Used Child Car Seat
If the prices mentioned are too expensive you can buy a used car safety seat for your child. Kijiji and Facebook Marketplace are good places to buy a used child car seat.
When you search for used car seats, check for cracks or damages. Also, make sure that the car seat comes with the user manual and all the straps and parts to ensure your child’s safety. There will be an expiry date on the car seat, to indicate the lifetime of the seat. If the car seat is nearing or has passed its expiry date, it would be a good idea to discard it and continue browsing.
Preparing for your driving test in Canada is vital, especially if you want to pass the exam on your first try. Getting a driving license in Canada can be a lengthy process. It involves both written driving test questions and a road test. Still, having a driver’s license in Canada is worth it. With a license, you can get around quickly and efficiently and save travel time. After all, time is money.
In this guide, you’ll learn about Canada’s graduated licensing system, driver’s license requirements at each level, and tips to prepare and pass your test.
Why is a Driving Test Necessary?
In Canada, provincial governments are responsible for establishing transportation laws. Because of this, a driving test will vary slightly from province to province, but the idea behind tests is the same. The test ensures your ability to drive a car while accounting for your safety and the safety of others. This ensures that everyone on the road prevents road accidents every day. Read more about the 10 key facts newcomers must know about driving in Canada.
Advantages Newcomers Have When Getting a Driving License
Canada and a group of countries entered the Foreign License Exchange Agreement. This agreement allows migrants between these countries to exchange their previous driving licenses with a new one.
The following countries have a License Exchange agreement with Canada:
Australia
Austria
Belgium
France
Germany
Japan
Korea
Ireland
Switzerland
Taiwan
United States of America
United Kingdom*
*United Kingdom: England, Wales, and Scotland are included in the agreement, but Ireland is excluded.
If you emigrate from one of these countries, you can exchange your previous driving license for a Canadian license without a driving test. This opportunity is only available to immigrants for a maximum of 60 days after arriving in Canada. After two months, you must go through the process to get a driving license.
This is also available to interprovincial migrants. If you already have a license in your current province and are moving to a new province, you can swap your old license for a new one.
Canada’s Graduated Licensing System
The graduated system has three levels:
G1 license
G2 license
G driving license.
These are the most common names for the tests, but some provinces have different names. Each license has a driving test. The tests are different according to the type of driving license.
G1 Driving Test Questions and License
The G1 driving license, also known as a learner’s permit, is the most basic of the three. It also is the easiest test to pass because it only has written driving test questions, and no driving is required. The test has two parts with 20 driving test questions in each part:
road rules
road signs.
In total, the G1 driving test has 40 multiple-choice questions.
You need 80% or higher in each section to pass the test. That means at least 16/20 questions correct in each section. If you pass one and fail the other, you will only need to retake the section you failed.
Here is a practice G1 knowledge test. It’s wise to take practice tests before your final G1 knowledge test to know what to expect.
G1 License Restrictions
Once you pass the test and get your learner’s license, you can drive a car with certain restrictions:
1. You must have an accompanying driver in the front passenger seat to assist and supervise you. This driver must have a full G license.
2. You cannot drive at a speed higher than 80 km/h or on any road with a speed limit higher than 80 km/h. If your accompanying driver is a driving instructor, however, you are allowed to drive on any road.
3. You are only allowed to drive between 5:00 AM and Midnight.
Not following any of these rules can have your license suspended as well as a fine, depending on your offence.
G2 Road Test and License
A G2 driving license gives you more freedom than a G1 license. This is why the test is harder to pass. For starters, the G2 driving test is a road test, so you must get in a car and show the instructor that you can drive a car. Some things that a G2 driving test will cover include:
Obeying traffic lights and traffic signs
Overtaking and lane-changing
Driving through intersections (both with traffic lights and stop signs)
Parking (parallel, forward, and reverse)
Making u-turns, two and three-point turns, and reversing
Turning your vehicle on and off as well as other internal features.
It’s vital to practice all of these actions before your driving test. Parallel parking is one of those things that people have trouble with. If you can’t get it right, it’s an automatic fail.
Checking your mirrors and obeying speed limits, traffic lights, and traffic signs are some things to keep in mind during the test. It is also best if you don’t ask for advice. The driving instructor is looking to see whether or not you know the rules.
For more information on the G2 driving test, take a look at Ontario’s Guide to a G2 Driving Test. Even though it is from the province of Ontario, it will give you a good idea of what to expect from a driving test anywhere in Canada.
G2 Driving License Requirements
You must meet the following requirements to take your G2 driving test:
You must have had your G1 learner’s license for at least 12 months.
Your car must be fully functioning. The driving instructor can cancel the test even if a single light is not working. This is why it is vital to check your car before the test.
And, of course, you must pass all aspects of the driving test.
G2 License Restrictions
There are some minor restrictions on G2 drivers as well. They only apply to G2 drivers aged 19 or under and between Midnight to 5:00 AM.
If you have had your G2 license for less than six months, you can carry a maximum of one person under the age of 19.
If you have had your G2 license for more than six months, you can carry a maximum of three people under the age of 19. This restriction is in place until you get your Full G license or turn 20.
G Driving Test and License
A G driving license is the most advanced of the three. Naturally, it gives you more driving privileges. This also means that the test to obtain a G license is more difficult to obtain. Once you have passed the test, however, a G License is worth it.
A G road test covers:
Everything that is covered in the G2 test
Highway driving: lane changing and overtaking
Merging into and exiting highways.
Since the G2 road test has no highway driving, the G License covers almost every aspect of highway driving plus everything covered in a G2 test. This ensures you can drive a car on any road and in any situation.
G License Requirements
The G road test only has one requirement: You must have had a valid G2 license for at least two years. If you have completed an approved driving course, you only need to have had your G2 for eight months. Again, these timeframes may differ depending on your province.
G License Restrictions
There are no restrictions on a driver with a G license. However, all drivers must follow speed limits, traffic lights and signs, and all driving rules. Drivers must also have zero blood alcohol content.
When you prepare for the written driving test questions and road tests, you’ll enjoy the convenience of driving in Canada.
We use cookies to enhance your experience, analyze site traffic, and support marketing. Some are essential, while others are optional. By clicking "Allow All," you consent to all cookies. You can "Disable All" or adjust your choices in "Cookie Settings." Update preferences anytime in our Privacy Policy.
We and our partners use information collected through cookies and similar technologies to improve your experience on our site, analyse how you use it and for marketing purposes. Because we respect your right to privacy, you can choose not to allow some types of cookies. However, blocking some types of cookies may impact your experience of the site and the services we are able to offer. In some cases, data obtained from cookies is shared with third parties for analytics or marketing reasons. You can exercise your right to opt-out of that sharing at any time by disabling cookies.
These cookies and scripts are necessary for the website to function and cannot be switched off. They are usually only set in response to actions made by you which amount to a request for services, suchas setting your privacy preferences, logging in or filling in forms. You can set your browser to block oralert you about these cookies, but some parts of the site will not then work. These cookies do not store any personally identifiable information.
Analytics
These cookies and scripts allow us to count visits and traffic sources, so we can measure and improve the performance of our site. They help us know which pages are the most and least popular and see how visitors move around the site. All information these cookies collect is aggregated and therefore anonymous. If you do not allow these cookies and scripts, we will not know when you have visited our site.
Embedded Videos
These cookies and scripts may be set through our site by external video hosting services likeYouTube or Vimeo. They may be used to deliver video content on our website. It’s possible for the video provider to build a profile of your interests and show you relevant adverts on this or other websites. They do not store directly personal information, but are based on uniquely identifying your browser and internet device. If you do not allow these cookies or scripts it is possible that embedded video will not function as expected.
Google Fonts
Google Fonts is a font embedding service library. Google Fonts are stored on Google's CDN. The Google Fonts API is designed to limit the collection, storage, and use of end-user data to only what is needed to serve fonts efficiently. Use of Google Fonts API is unauthenticated. No cookies are sent by website visitors to the Google Fonts API. Requests to the Google Fonts API are made to resource-specific domains, such as fonts.googleapis.com or fonts.gstatic.com. This means your font requests are separate from and don't contain any credentials you send to google.com while using other Google services that are authenticated, such as Gmail.
Marketing
These cookies and scripts may be set through our site by our advertising partners. They may be used by those companies to build a profile of your interests and show you relevant adverts on other sites. They do not store directly personal information, but are based on uniquely identifying your browser and internet device. If you do not allow these cookies and scripts, you will experience less targeted advertising.
Facebook Advanced Matching
Facebook Advanced Matching can improve ads attribution and conversion tracking. It can help us reach better-targeted custom audiences through our ads. When possible, we will share with Facebook hashed information like your name, phone, email, or address.
Facebook CAPI
Facebook Conversion API Events (CAPI) help us better understand how you interact with our websites. They allow us to measure the impact of our ads on the website's conversions and they improve ads targeting through custom audiences. When possible, we might share with Facebook information like name, email, phone, address.